Dear visitors,
It has been a good number of years since I blogged anything on this site. Due to work, I found myself to have less energy to write long detailed blog posts.
This year, I made a very important decision to leave my workplace and pursue my dreams. I am currently enrolled in a culinary school and doing a course in Pastry and Baking .
I am back to being an active baker, though I am no longer self-taught. It was fun being a self-taught baker learning primarily from books and reading articles. However the process was slow and I was not disciplined to do consistent self-learning and experimentation. I figured that I needed a new environment where I have the baking momentum that I can fully immerse in.
It will be an exciting experience and I am not sure where my baking journey will take me. I do know I am joyful to be connecting with my baking roots once again.
My apologies for neglecting this blog for so long. I will be blogging on a new platform on Instagram @ Bakertanbakes
Thank you for dropping by and happy baking! Always lovely to spread the joy and love of food to others through baking.
Regards
Bakertan
Instagram link: http://instagram.com/bakertanbakes
Instagram Username : Bakertanbakes
Saturday, November 17, 2018
Tuesday, March 13, 2012
Back to Basics - Orange Butter Cake

After two hectic months of work, it is finally time for a short break. While I recharge myself physically and emotionally so that I may be all ready to take on any challenges or pressures at work, it is also time to revisit my pantry and say Hi to my baking books once again.
Looking at the few blocks of Président French butter tucked away quietly in my refrigerator, I felt that it was time to whip up a butter cake; something simple yet able to satisfy my sweet palate at the same time.

Referring to the Sicilian Orange Cake recipe from Almost Bourdain, a fuss free recipe that uses but a few easy to obtain ingredients, the end result was a fluffy and tender butter cake with bursts of bright citrusy flavour from the orange zests used.
I particularly loved the proportion of butter, sugar and eggs formulated in this recipe. When doing most butter cakes, the amount of eggs used is often too much for the volume of creamed butter to hold. This often results in a somewhat curdled mixture which is said to affect the fluffiness of the resulting cake or may cause the cake to be oily.
When I was adding eggs (170g) to the creamed butter ( 250g), the eggs and butter emulsified beautifully without a single trace of separation, making the mixing process a reassuring one. I strongly believe this might be the tipping point before the butter-egg mixture separates should any more eggs be added to the mixture. I will be discussing further on this hypothesis in my upcoming post on banana butter cake.
Orange Butter Cake (recipe slightly adapted from Almost Bourdain)
Serving size: 9 x 5 inch loaf cake, serves about 10 slices.
Taste and texture: Citrusy, fluffy and tender with the right amount of moisture.
Equipment and materials:
- 9 x 5 inch loaf tin
- Handheld electric mixer/ Stand electric mixer
- Spatula
- Grater
- Mixing bowls
- Wire rack
- flour sieve
- Weighing scale
- Baking/ parchment paper
- Pastry brush for oiling pan
Ingredients:
- 250g good quality unsalted butter, softened
- 185g castor sugar
- 170g whole eggs, at room temperature
- 100ml freshly squeezed orange juice
- finely grated zests of 2 oranges (see instructions below)
- 250g self raising flour
Preheat Oven and preparing baking tin - Preheat oven to 180 degrees C. Line a 9 x 5 loaf tin with baking paper.
Rubbing orange zests and sugar - Grate orange zests over castor sugar to catch the orange oil. Using your hands, rub the orange zests and the castor sugar until the flavour is infused into the sugar. The castor sugar will be pale orange in colour.
Creaming the butter - In a large mixing bowl, cream butter and orange-infused sugar on medium high speed for about 5 minutes until pale and fluffy (as mentioned in how to cream butter).
Adding eggs to creamed butter - Add beaten eggs to creamed butter in 6 additions and mix on medium speed, ensuring each addition is well incorporated before adding the next addition. The batter will become wet as more eggs is added but will slowly firm up when the last portion of eggs are mixed in.
Adding flour mixture and orange juice - Sieve 1/3 of the self raising flour to the egg-butter mixture. Mix on low speed until the last bit of flour is absorbed. Next, add in half the orange juice and continue mixing until the orange juice is incorporated. Repeat the mixing process by sifting another 1/3 portion of self raising flour, followed by the remaining half of the orange juice, lastly followed by sifting in the remaining 1/3 of the self raising flour. Scrape the sides and bottom of the bowl with a spatula to incorporate loose ingredients.
Baking the cake - Pour batter into lined 9 x 5 loaf tin. Bake the batter for 50-60 mins at 180 degrees C. Allow cake to cool in loaf tin for 10 minutes before removing cake from loaf tin. Allow cake to cool completely on a wire rack before storing.
Instagram link: http://instagram.com/bakertanbakes
Sunday, March 4, 2012
Awards 2012
Apologies to my fellow bakers Jane from Passionate about Baking and Judy from A Busy Gran's Kitchen for accepting the following awards so late! Thank you ladies for passing these awards to me, I am truly honoured and proud to be a recipient of these two awards =].
The past two months have been quite a mad rush, leaving me fatigued after my work hours. Even during my free time, I still have to do some work-related planning and preparation. The rest of my free time is spent with my family and close friends. On a good weekend when I have no plans to step out of the house, I would just stay at home and rest, doing nothing much except surfing the net and watching tv. Hence, little attention have been given to baking and blogging for the past two months.
Hopefully, I can to get out this cycle soon and get some baking and blogging done..


Instagram link: http://instagram.com/bakertanbakes
Chinese New Year Bakes 2012
My baking blog seems to be gathering cobwebs due to several weeks of neglect. Before it continues to fall apart due to lack of maintenance, it is time to do some "Spring Cleaning" and "repair works".
This post was supposed to be up during Chinese New Year period. For this Chinese New Year, I have decided to move away from doing just the usual pineapple tarts. Come to think of it, it is my fourth year doing the all-time festive favourite. Before I could decide if I want to make the pineapple paste from scratch, mum happily handed me two packets of store-bought paste, leaving me with no choice but to use them.
Ever since I had my maiden attempt on making homemade pineapple jam, the bar has been raised. I am no longer satisfied with the one-dimensional plainly sweet pineapple jam. There is far too much sugar in store-bought paste, probably necessary to allow the paste to keep for a long period of time. In addition, store-bought jam is much drier compared to homemade ones, does not taste as fruity and lack the cinnamon taste which gives it the extra oomph.
Next year, I will likely not be doing any pineapple tarts and will be shifting the focus to trying out other CNY cookies instead.


Besides doing pineapple tarts, I have tried Florence's peanut cookies recipe. These cookies are so fragile that they crumble in the mouth right away, giving the melt-in-the-mouth texture. Personally, I prefer my peanut cookies to be firm and crunchy, but taste-wise there is nothing for me to find fault with, for they are packed with loads of peanut flavour. I will be using caster sugar in place of the icing sugar for this same recipe next CNY to give a crunchy texture instead.


Peanut Cookies (recipe from Do What I Like by Florence)
Taste and Texture: Strong peanut flavour with melt-in-the-mouth texture.
click on the following link for recipe:
recipe
Instagram link: http://instagram.com/bakertanbakes
This post was supposed to be up during Chinese New Year period. For this Chinese New Year, I have decided to move away from doing just the usual pineapple tarts. Come to think of it, it is my fourth year doing the all-time festive favourite. Before I could decide if I want to make the pineapple paste from scratch, mum happily handed me two packets of store-bought paste, leaving me with no choice but to use them.
Ever since I had my maiden attempt on making homemade pineapple jam, the bar has been raised. I am no longer satisfied with the one-dimensional plainly sweet pineapple jam. There is far too much sugar in store-bought paste, probably necessary to allow the paste to keep for a long period of time. In addition, store-bought jam is much drier compared to homemade ones, does not taste as fruity and lack the cinnamon taste which gives it the extra oomph.
Next year, I will likely not be doing any pineapple tarts and will be shifting the focus to trying out other CNY cookies instead.

Preparing the pineapple balls and pineapple tart crust.

Store bought pineapple paste. Sweet and sticky.

Pineapple tart pastry made with Lurpak butter.

Besides doing pineapple tarts, I have tried Florence's peanut cookies recipe. These cookies are so fragile that they crumble in the mouth right away, giving the melt-in-the-mouth texture. Personally, I prefer my peanut cookies to be firm and crunchy, but taste-wise there is nothing for me to find fault with, for they are packed with loads of peanut flavour. I will be using caster sugar in place of the icing sugar for this same recipe next CNY to give a crunchy texture instead.

Just a few tubs of CNY goodies I have made.

Peanut cookies and pineapple tarts.
Peanut Cookies (recipe from Do What I Like by Florence)
Taste and Texture: Strong peanut flavour with melt-in-the-mouth texture.
click on the following link for recipe:
recipe
Instagram link: http://instagram.com/bakertanbakes
Saturday, December 31, 2011
Welcome 2012!
A year has passed and it is time to usher in a brand new year. Goodbye 2011 and Welcome 2012! With the birth of a new year, I guess it is a habit for many of us to set new year resolutions. I am not someone who would obediently follow the resolutions that have been set. Hence, my resolutions shall be kept to a minimum and as simplistic as possible. All I wish for in 2012 would be to continue my explorations in baking and continue penning my thoughts here. Even if there would be lesser entries, it will at least keep the blog going and remind me of my love for baking, and not to forget the sharing of this satisfying therapeutic activity.
Since mid-2011, there has been a change of priority in my life. Life became busier with work involvement and social activities, making baking a luxury activity to indulge in whenever I have the spare energy and time. Hence, that explains why my frequency of blogging dwindled for the past few months. On the other hand, I am not quite sure if age is another factor for the diminishing energy level. Sometimes, I feel like lazing and sitting in front of the TV lying on my comfortable sofa, switching from channel to channel, watching any programs that arouse my attention. Well, maybe its just plain old lazy me, trying to make excuses for myself.
On New Year's Day, I was browsing and reading my past entries. It has been a good three years since I started baking and blogging. As I was looking at the bakes I have made over the years, the nostalgia reminded me I have came quite a way (not very long it might be), starting from scratch. Thanks to the constant encouragement and affirmation from my family, friends, colleagues, fellow bakers and readers, I am able to sustain this passion and keep it going.
Looking back into 2011, the following is a roundup of some of the bakes:


Baking, to me, is my comfort zone. It is also a sense of assurance, motivation and self confidence. I have always enjoyed the process of reading recipes and trying out bakes of all kinds - cakes, cookies, tarts, just to name but a few. It is especially gratifying when the bakes turn out great. That would mean I have treats to savour on afterwards.
As of now, I have not exactly tried out that many things. There are still tons of recipes out there beckoning to me, especially those from the bake books sitting on my book shelf. These recipes alone would suffice to last for a decade or two if I were to bake one recipe a day! Therefore for this 2012, I will continue on my journey for improvement, explore more bakes and strive to be a better baker.
Before I end off with my first post of the year, I would like to share another of my Xmas bake of 2011, a Cookies and Cream Log Cake.


(recipe for log cake to be posted on a later date)
Since mid-2011, there has been a change of priority in my life. Life became busier with work involvement and social activities, making baking a luxury activity to indulge in whenever I have the spare energy and time. Hence, that explains why my frequency of blogging dwindled for the past few months. On the other hand, I am not quite sure if age is another factor for the diminishing energy level. Sometimes, I feel like lazing and sitting in front of the TV lying on my comfortable sofa, switching from channel to channel, watching any programs that arouse my attention. Well, maybe its just plain old lazy me, trying to make excuses for myself.
On New Year's Day, I was browsing and reading my past entries. It has been a good three years since I started baking and blogging. As I was looking at the bakes I have made over the years, the nostalgia reminded me I have came quite a way (not very long it might be), starting from scratch. Thanks to the constant encouragement and affirmation from my family, friends, colleagues, fellow bakers and readers, I am able to sustain this passion and keep it going.
Looking back into 2011, the following is a roundup of some of the bakes:

Clockwise, starting from top left: Bear and Chick Cupcakes, Cream Cheese Marble Brownies, Devil's Food Cake, Rich Brownies

Clockwise, starting from top left: Chocolate Mud Cupcakes, Yam Fudge Cake, Cookies and Cream Layer, Chocolate Lava Pudding

Clockwise, starting from top left: Mini Cookies and Cream Cheesecakes, New York Cheesecake, Chocolate Mud Cupcakes with Chocolate Buttercream, Hotdog Buns

From left to right: Mini Raspberry Swirl Cheesecakes, Mango Mousse Log Cake
Baking, to me, is my comfort zone. It is also a sense of assurance, motivation and self confidence. I have always enjoyed the process of reading recipes and trying out bakes of all kinds - cakes, cookies, tarts, just to name but a few. It is especially gratifying when the bakes turn out great. That would mean I have treats to savour on afterwards.
As of now, I have not exactly tried out that many things. There are still tons of recipes out there beckoning to me, especially those from the bake books sitting on my book shelf. These recipes alone would suffice to last for a decade or two if I were to bake one recipe a day! Therefore for this 2012, I will continue on my journey for improvement, explore more bakes and strive to be a better baker.
Before I end off with my first post of the year, I would like to share another of my Xmas bake of 2011, a Cookies and Cream Log Cake.

Spreading the cookies and cream filling onto the chiffon sheet.

The rolled up Swiss roll, a log cake in its "naked" state.

Cross section of the log cake, before frosting. Needs more practice on my rolling skills


The final product after frosting. Homemade cookies and cream log cake for all occasion, with no snow man or any Xmas decorations.
Although it is only the second week of the year, the Chinese New Year is fast approaching already. Hopefully, my "CNY factory" will be faithfully churning out some goodies over the weekend in preparation for the festivities. Peanut cookies, Pineapple tarts, Sugee Cookies, Almond cookies, Kueh Lapis..... I am coming for you!
(recipe for log cake to be posted on a later date)
Tuesday, December 27, 2011
Merry Xmas 2011 and a Mango Mousse Log Cake
Merry Xmas to all of you out there! (I am still bathing in the mood of the Xmas as I am posting this. Hope it is not too late for greetings.) Christmas is one festive holiday in the year which I always look forward to. Somehow, the joy factor rises to an all-time-high and everyone seems to be pretty much hyped up and all ready for the arrival of this great festive season.
When it comes to the month of Dec, my mind would be preoccupied with festive shopping for gifts and not to forget, Xmas bakes! I had a couple of ideas for Xmas bakes this year - brownie cupcakes with chocolate peppermint patty center, mint chocolate cookies, Christmas tree cupcakes; but I decided not to make it an tiring affair. Instead, I made some orange cranberry shortbread and a mango mousse log cake since R2E2 mangoes are in season.


While I was doing grocery shopping for a Xmas potluck, R2E2 mangoes were going on sale (2 for S$6.55). Unable to resist the urge, I picked up two of these cheery-summery looking stone fruits and the idea of making a mango log cake was waving at me.
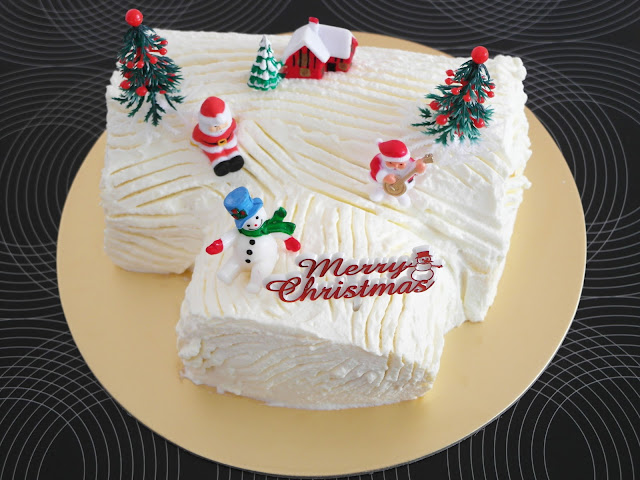
Since the idea of doing the log cake was a last minute gut-feeling affair, I was unable to grab hold of Christmas log cake toy decorations. I had to borrow a stash of it from my baking buddy. Guess what? I returned her the toy decorations, but on top of the mango log cake.
Taste and texture: Cake base is soft, moist and fluffy. Mango mousse filling is fruity, smooth and light.
Equipment and materials:
Separated-egg Sponge Cake Ingredients:
Mango Mousse filling:
Making the separated-egg sponge:
Prepare Oven and line pan - Preheat oven to 190 degrees C and line tin with baking/parchment paper.
Preparing the egg yolk mixture - In a mixing bowl, whisk together the egg yolks and 25g castor sugar. Whisk the egg yolks with a beater on high speed until the yolks have increased in volume, are paler looking in colour and thickened.
Beating egg whites - In a metal bowl, beat eggs whites starting with low speed. When the egg whites turn frothy, slowly increase the speed to high and beat until egg whites are soft peaks (egg whites form peak that is drooping). Add the sugar (75g) slowly at this point and continue beating until egg whites are nearly stiff but still moist and not dry. This is when the bowl is overturned, the egg whites would not budge. Egg whites will form shiny and creamy upright peaks when beater is withdrawn. Take care not to overbeat the egg whites as they will become dry or may water out.
Folding egg whites into egg yolk mixture - Fold one third of beaten egg whites with a balloon whisk into egg yolk mixture to lighten and mix well. Incorporate another one third of the whites. Lastly, add the rest of the egg whites and fold gently to obtain a smooth uniformly coloured foamy batter. Scrape sides and bottom of bowl with a spatula to ensure batter is well mixed.
Adding flour and butter - Fold flour gently into the whites-yolk mixture in 3 batches with a balloon whisk, turning the bowl as you fold. Ensure that there are no visible traces of flour before adding the next batch.
Baking the cake - Pour batter into a 12 x 12 inch tin or 10 x 14 inch lined swiss roll tin. Level the batter and bake for about 12 minutes. Start checking for done-ness at 9 mins. Cake is done when inserted toothpick comes out clean. Allow sheet cake to cool.
Preparing Mango Mousse:
When it comes to the month of Dec, my mind would be preoccupied with festive shopping for gifts and not to forget, Xmas bakes! I had a couple of ideas for Xmas bakes this year - brownie cupcakes with chocolate peppermint patty center, mint chocolate cookies, Christmas tree cupcakes; but I decided not to make it an tiring affair. Instead, I made some orange cranberry shortbread and a mango mousse log cake since R2E2 mangoes are in season.
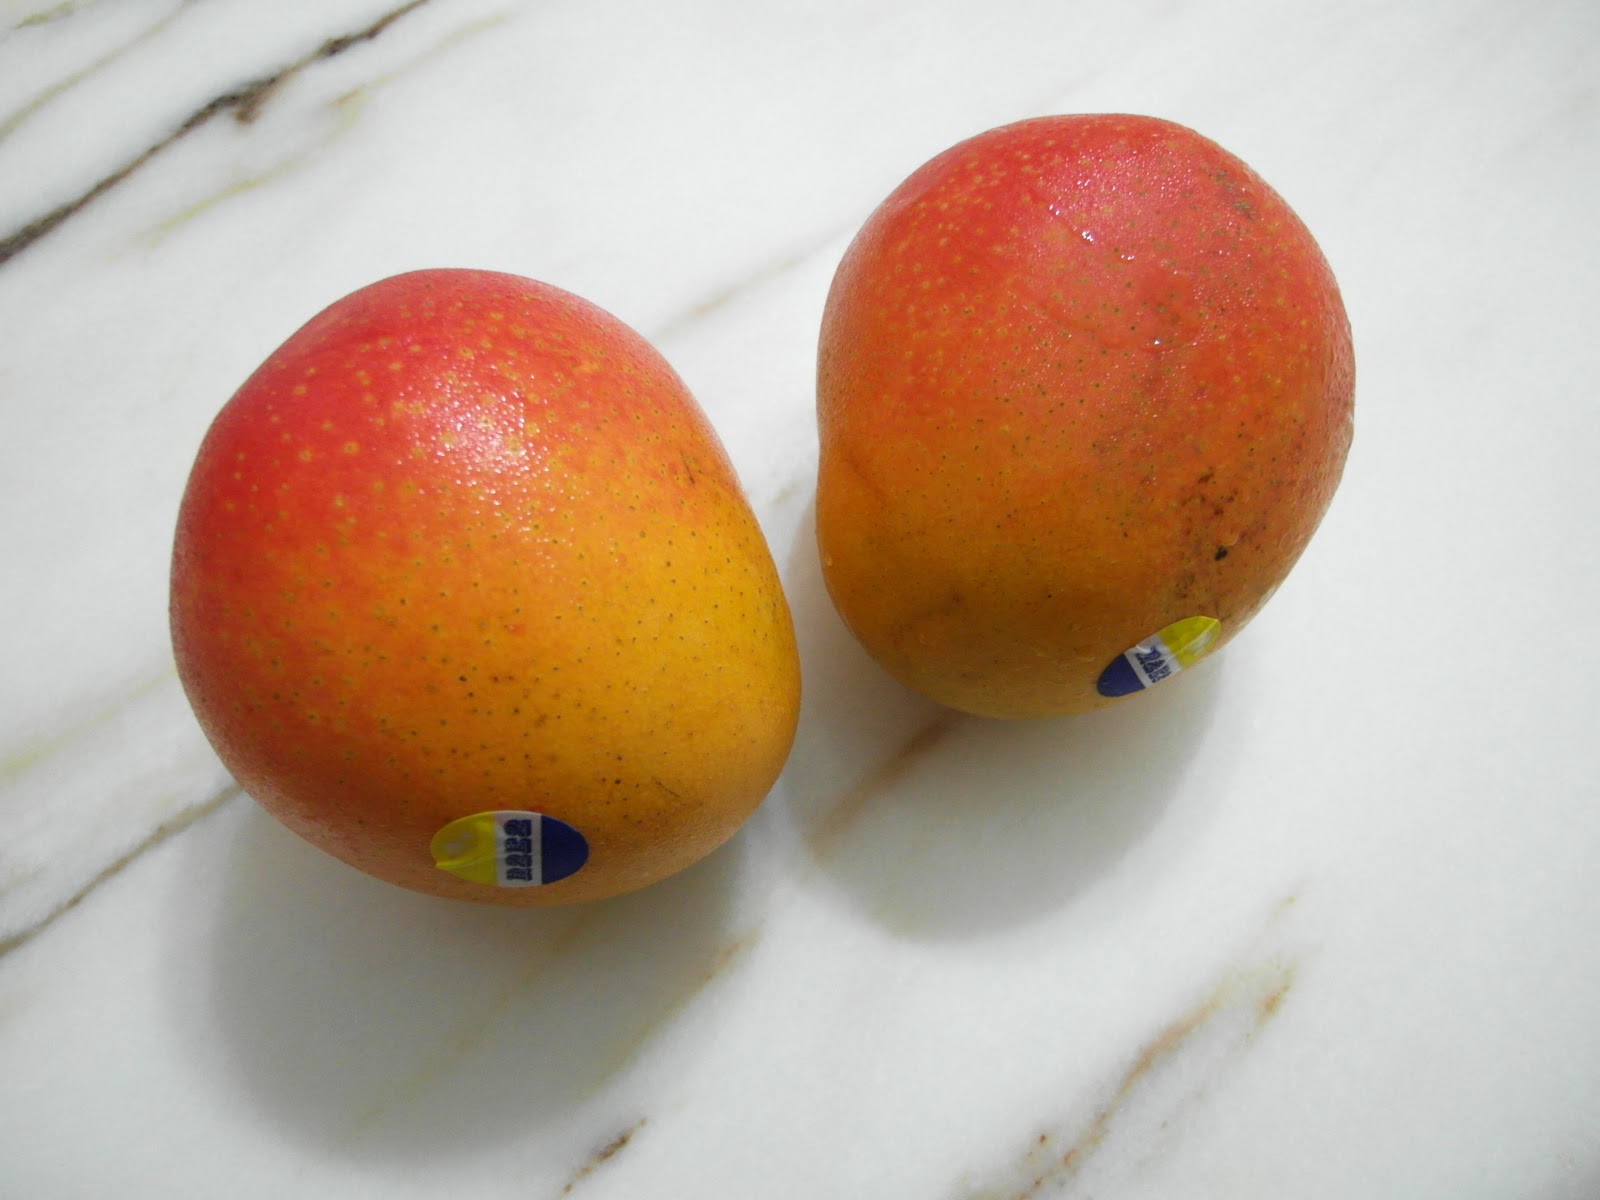

While I was doing grocery shopping for a Xmas potluck, R2E2 mangoes were going on sale (2 for S$6.55). Unable to resist the urge, I picked up two of these cheery-summery looking stone fruits and the idea of making a mango log cake was waving at me.
These days, I am more inclined towards eating mangoes that are plump and have reddish-orange skins. Such mangoes tend to be sweeter and more fragrant than the usual yellow coloured varieties like the Thai honey mangoes, which are a little lacking in fragrance.


Compared to layer cakes, log cakes are much easier to prepare. They are in fact Swiss rolls disguised with an exterior of cream frosting. While I was doing the rolling, it reminded me of a failed attempt of a black forest log cake the year before. Previously, the filling was too runny and it made the rolling difficult to execute, causing the end product to be a mess.

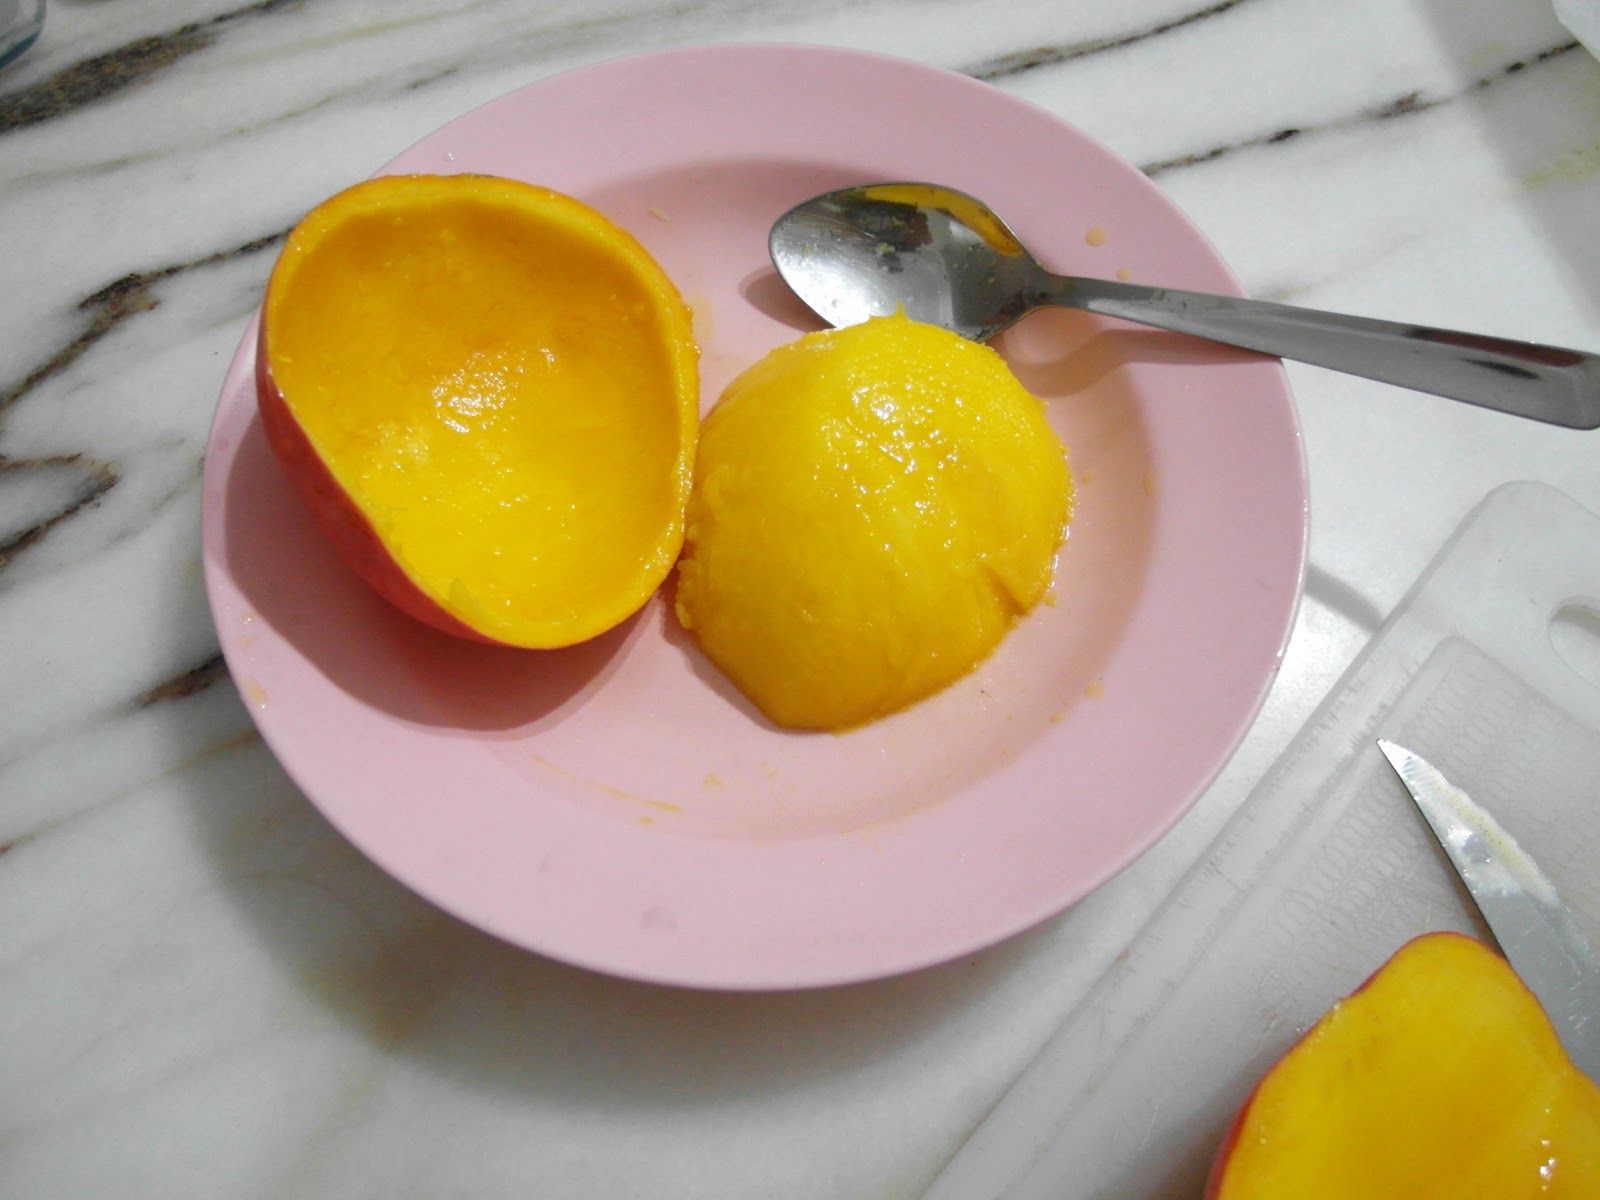
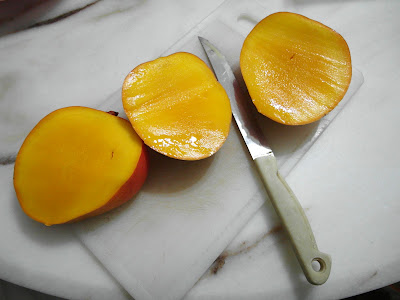
It might prove to be tricky for some people when it comes to removing the skin from the flesh, but this can be easily done with some clever manoeuvre of the knife and a spoon. First, slice the mango following the curve of the stone on one side, sticking as close as possible to the stone. Repeat the same for the other side. You will end up with 3 sliced portions of mango, as shown in the first picture above. To remove the skin from the two portions without the stone with ease, simply use a spoon and dig as closely to the skin as possible starting from one end, until a whole chunk of mango is released from the skin. This chunk can then be used for diced easily for use in cooking or baking. I remember watching a chef preparing mangoes and have been using this method ever since.


The same thing happened a second time. The mango mousse filling was a little runny and after rolling the sheet cake, some of the filling were 'pushed out' of the Swiss roll. Luckily, it didn't turn out a big mess and was decent enough to be frosted into a log cake. Next time, I would do the following:
- Slope the filling towards the side to be rolled so that there is less filling on the ending side and the mango mousse would not be pushed out after rolling.
- Omit the last row of diced mango and mango puree.
- Chill the mango mousse with the sheet cake and toppings so that it would be much easier to roll and the filling would not be so runny.


Since the idea of doing the log cake was a last minute gut-feeling affair, I was unable to grab hold of Christmas log cake toy decorations. I had to borrow a stash of it from my baking buddy. Guess what? I returned her the toy decorations, but on top of the mango log cake.
I made some observations when frosting the log cake with dairy whipping cream. All along, I have been faithfully using diary cream. When whipped and frosted, the appearance always look somewhat clumpy and un-smooth, unlike the smoothly frosted log cakes/cakes found in bakeries. I have been told that log cakes in bakeries are frosted with fresh cream. However, the so called 'fresh cream' from these cakes taste more like a cross between buttercream and dairy whipped cream, which puzzles me.
All this while, I have never used non-dairy cream or whip-topping cream which are non-dairy in nature, but my experience tells me that dairy whipping cream taste nothing like buttercream and whipped fresh cream is no where as smooth as buttercream. Hence, I cannot help but suspect that the cream used for giving cakes that smooth appearance is actually non-dairy cream or whip topping cream and nothing like fresh cream as what some bakeries have claimed. Perhaps my dear fellow bakers can share your experience with use of whip topping cream and non-dairy whipping cream.
Mango Mousse Swiss Roll/Log Cake (Sponge recipe adapted from 孟老师的美味蛋糕卷)
Serving size:10-12 slicesTaste and texture: Cake base is soft, moist and fluffy. Mango mousse filling is fruity, smooth and light.
Equipment and materials:
- 12 x 12 inch pan or 10 x 14 inch pan
- Stand electric beater/ handheld electric beater
- Spatula
- Wire whisk/balloon whisk
- Mixing bowls
- Wire rack
- Flour sieve
- Parchment/baking paper
- Brush for oiling pan
- Weighing scale
Separated-egg Sponge Cake Ingredients:
- 40g unsalted butter, melted and cooled
- 80g egg yolks, at room temperature
- 25g caster sugar
- 170g egg whites, at room temperature
- 75g caster sugar
- 60g cake flour, sifted
Mango Mousse filling:
- 180g fresh mango puree (Use a good variety of mango for best results)
- 180ml dairy whipping cream
- 70g mango, diced
- 50g fresh mango puree
Whipped Cream Frosting:
- 250ml whipping cream (dairy or non-dairy)
Making the separated-egg sponge:
Prepare Oven and line pan - Preheat oven to 190 degrees C and line tin with baking/parchment paper.
Preparing the egg yolk mixture - In a mixing bowl, whisk together the egg yolks and 25g castor sugar. Whisk the egg yolks with a beater on high speed until the yolks have increased in volume, are paler looking in colour and thickened.
Beating egg whites - In a metal bowl, beat eggs whites starting with low speed. When the egg whites turn frothy, slowly increase the speed to high and beat until egg whites are soft peaks (egg whites form peak that is drooping). Add the sugar (75g) slowly at this point and continue beating until egg whites are nearly stiff but still moist and not dry. This is when the bowl is overturned, the egg whites would not budge. Egg whites will form shiny and creamy upright peaks when beater is withdrawn. Take care not to overbeat the egg whites as they will become dry or may water out.
Folding egg whites into egg yolk mixture - Fold one third of beaten egg whites with a balloon whisk into egg yolk mixture to lighten and mix well. Incorporate another one third of the whites. Lastly, add the rest of the egg whites and fold gently to obtain a smooth uniformly coloured foamy batter. Scrape sides and bottom of bowl with a spatula to ensure batter is well mixed.
Adding flour and butter - Fold flour gently into the whites-yolk mixture in 3 batches with a balloon whisk, turning the bowl as you fold. Ensure that there are no visible traces of flour before adding the next batch.
Once the flour has been incorporated, scoop a portion of the mixture into a small mixing bowl and combine with the melted butter. Fold this mixture back with the bulk of the flour-white-yolk batter to obtain the final batter.
Baking the cake - Pour batter into a 12 x 12 inch tin or 10 x 14 inch lined swiss roll tin. Level the batter and bake for about 12 minutes. Start checking for done-ness at 9 mins. Cake is done when inserted toothpick comes out clean. Allow sheet cake to cool.
Preparing Mango Mousse:
Whip180ml of dairy cream until is reaches mousse state, about 70% stiff (before soft peak stage). Fold the whipped cream into 180g of mango puree until well combined. Set mango mousse aside.
Preparing whipped cream frosting:
Before whipping the cream, chill the mixing bowl and beaters. In a chilled mixing bowl, whip 250ml of whipping cream on medium speed until it becomes mousse-like. Turn the speed to low and beat until it produce soft peaks. Do not beat it too stiff as the whipped cream will turn grainy when frosted.
Assembly:
Turning the cake out - Carefully turn the cooled sheet cake onto a piece of baking/parchment paper. Slowly peel off the attached baking/parchment paper from the cake. Place a new piece of baking/parchment paper over the sponge. Invert the sponge again, carefully. Now, peel of the top piece of baking/parchment paper. The skin would be stuck to the baking/parchment paper and would be removed.
Applying the filling - Dab a layer of mango mousse onto the cooled sponge sheet. Ensure the starting end has a thicker layer of mousse and the ending side has a thinner layer of mousse.
Place a row of diced mango onto the mousse layer near the starting end and another row in the middle.
Using a spoon, scoop the mango puree and form a stream of puree between the two rows diced mangoes. Add another stream of mango puree further down the second row of diced mangoes. It will look something similar to that as shown in the 6th picture above, without a 3rd row of diced mango and 3rd stream of mango puree.
Rolling the cake - With the shorter side/breadth facing you (if using 10 x 14 inch pan), roll the cake up tightly to form a swiss roll. Allow swiss roll to chill in the refrigerator until mousse filling is set.
Rolling the cake - With the shorter side/breadth facing you (if using 10 x 14 inch pan), roll the cake up tightly to form a swiss roll. Allow swiss roll to chill in the refrigerator until mousse filling is set.
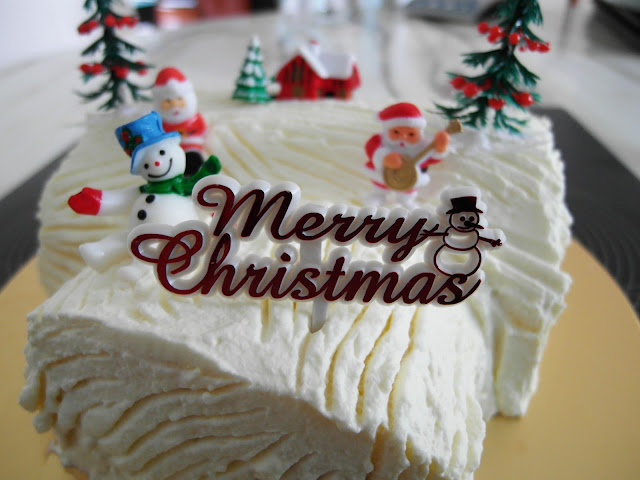
Frosting the log cake: Place swiss roll on a 10 x 10 inch square cake board. Slice one-fifth of the log and position this sliced portion at the side of the main roll. This is to give the log cake a branched shape. Chuck rectangular slips of baking paper under the log cake.
Apply a thin layer of whipped cream over the swiss roll, ensuring all sides are covered with cream. Use the tines of a fork to scratch along the surface of the whipped cream frosting to create a 'tree bark' effect. For a snowy effect, dust with snow powder/icing sugar and decorate as desired. Carefully remove the rectangular slips of paper.
Apply a thin layer of whipped cream over the swiss roll, ensuring all sides are covered with cream. Use the tines of a fork to scratch along the surface of the whipped cream frosting to create a 'tree bark' effect. For a snowy effect, dust with snow powder/icing sugar and decorate as desired. Carefully remove the rectangular slips of paper.
Notes:
- Serve log cake chilled. Mango mousse filling would not hold its shape well at warm room temperature for long.
- Dairy or non-dairy cream may be used.
- Whipped cream will continue to firm up when frosted, hence take care not to whip the cream too stiff. A softly whipped cream, slightly flowy with soft peaks (about 70% stiff) is ideal.
Instagram link: http://instagram.com/bakertanbakes
Friday, December 16, 2011
Savoury for a Change - Chicken Pies

It is time for a change! As sweet-toothed as I may be, I cannot be relying on my sweet bakes to fill my stomach or replace my daily meals. With some inspiration from Masterchef series and suggestions from H, I decided to do a savoury bake, and chicken pies shall be on the menu.

Since the preparation of the filling involved cooking, there is no hard and fast rule with regard to the ingredients used. Instead of using frozen mixed vegetables, freshly diced carrots were used instead. I also made a couple of tweaks to the pie crust recipe and the chicken pie filling proportion.
For a first attempt on chicken pies, I am rather comforted by the flakiness of the pie crust. Despite the moist filling and an absence of a blind-baked pie dough, the pie base had not turned soggy at all. Perhaps the baking of the pies on a preheated baking tray placed in the lower rack of the oven might have helped, a tip I picked up from my stash of baking books.

To me, most pie dough recipes look all quite the same, be it the ingredients used or the proportion of ingredients. However, the handling of the pie dough makes so much difference when it comes to determining the pie crust texture. Unlike cakes where it is often necessary to ensure that ingredients are evenly dispersed within the batter, there is no need for even dispersion of ingredients in pie dough. The uneven dispersion of different sized butter pebbles in the pie dough allows for a flaky texture, when the butter turns into steam in the process of baking.
Chicken Pies (recipe adapted from Baking Mum)
Serving size: 9 three-inch pies
Taste and texture: Flaky buttery pie dough with moist chicken pie filling
Equipment and materials:
- Flour sieve
- Balloon whisk
- Measuring spoon set
- Mixing bowl
- Wire rack
- Fork
- Pastry blender (optional) or two sharp knives
- Clingfilm
- 3-inch individual tart tins
Flaky pie dough pastry:
- 250g plain flour
- 1/4 tsp salt
- 170g chilled unsalted butter, cubed
- 1 egg yolk, chilled
- 4 tbs plain yogurt or sour cream, chilled
- 1 egg, lightly beaten for egg wash
Chicken Pie Filling:
- 150g potato, peeled and cubed
- 50g carrot, peeled and cubed
- 1 large yellow onion, peeled and cubed
- 260g chicken breast meat, cubed
- 110g canned (drain water solution away) or fresh mushrooms, thinly sliced
- 120ml homemade or store-bought chicken stock
- 1 tbs cornflour mixed with 2 tbs water to form a solution
- salt and pepper, to taste
Making chicken pie filling:
Oil a pan with some cooking oil. Place the cubed potato and fry over medium heat for 3 minutes. Add cubed carrots and frying the mixture for another two minutes. Set carrots and potatoes aside.
Next, sauteed the onions until soft and fragrant. Add in chicken breast and mushrooms. Cook the mixture for about 2 minutes.
Lastly, add in the cooked potato and carrot. Pour 120ml of chicken stock and allow the mixture to simmer on low heat for 4 minutes, without covering. Allow the liquid to reduce. When most of the of liquid has reduced, add the corn flour solution to the thicken the mixture. Add salt and pepper to taste. The chicken pie filling should be a mixture of ingredients coated with a thick sauce.
Making the flaky pie dough pastry:
Mixing dry ingredients - In a mixing bowl, sift in flour. Add in salt. Whisk with a balloon whisk to distribute the ingredients evenly.
Forming the pastry - Cut chilled cubed butter into flour with a pastry blender until there is a mixture of different sized flour-coated butter 'pebbles' and fine flour-coated butter 'crumbs'. Alternatively, rub the cubed butter into the flour with your clean hands. Mix the egg yolk with the yoghurt/ sour cream. Drizzle in the yolk + yogurt/sour cream mixture use a fork to moisten the flour-coated butter 'crumbs'.
Gently gather the crumbs and knead briefly so that the crumbs come together to form a dough. Wrap dough with clingfilm and chill dough for at least 30 minutes. To save time, freeze dough until it is firm enough to handle.
Making the chicken pies - Divide dough into 9 portions. Pinch about 2/3 of one portion of dough to roughly form a ball using both palms. Place the dough ball on one palm and use the other to flatten it evenly, big enough to fit into a three-inch tart tin. Place the flattened dough over the tart tin and press it in place, ensuring thickness is even throughout.
Spoon and compact cooled chicken pie filling onto pie dough base. With the remaining 1/3 of one portion of dough, roll it into a rough shaped ball and flatten it until it is big enough to cover the fillings. Cover fillings with pie dough and press down to seal the edges. Repeat for the remaining 8 portions of pie dough. Chilled ready-to-bake chicken pies for 20 minutes.
Baking the tart crusts - While chilling ready-to-bake chicken pies, preheat oven to 200 degrees C. Brush egg wash onto the chicken pies. Using a fork, prick over the top of each chicken pie, allowing air to escape and ensure pie dough do not rise much.
Place chicken pies onto a preheated baking tray and bake for about 30-35 minutes in the middle rack or until tart crusts are golden brown. If pie dough do not brown after 20 minutes into baking, transfer to upper rack and bake a further 10-15 minutes to achieve a golden brown appearance. Allow chicken pies to cool slightly in tart tins before removing them from the tart tins to cool completely on a wire rack. Serve chicken pies warm.
Notes:
- For better flavour, marinate chicken breast or add some herbs when cooking the filling.
- Increase the proportion of chicken breast used if a more meaty filling is desired.
Subscribe to:
Posts (Atom)